This post may contain affiliate links. As an Amazon Associate we earn from qualifying purchases.
When you’re building a house, plastering the ceiling is a great way to add an extra touch to the room without breaking the bank. Not only is it less expensive than drywall, it is also a much simpler process, and it’s far easier to do.
If you’ve never plastered a ceiling before, here are some tips to help you get started. Listed below are some reasons to try plastering your ceiling instead of drywall.
Less expensive than drywall
When you have a new home, you might be thinking about whether it’s worth plastering the ceiling. The answer is “yes.” Plastering a ceiling is far less expensive than hanging drywall. Plaster costs around $2.50 to $3.80 per square foot, including demolition and disposal. However, it’s worth keeping in mind that plastering takes more time than hanging drywall and requires more skill.
Another reason to use plaster is its durability. Both types require some maintenance, and plaster is easier to repair and maintain than drywall. Luckily, drywall is also easier to work with than plaster. You can do many repairs yourself, and you don’t have to call a contractor if you’re in a pinch. And since it’s easier to apply than drywall, you’ll save money.
If you don’t want to hire a professional, you can do it yourself with sheet wood. You can buy panels of vinyl, which is a cheap option and easy to install. You’ll need a table saw with a specialized blade to cut it to size. Vinyl is also a great alternative to drywall because it’s easy to install. It can also be painted or stained to make it look better.
Plastering a ceiling is not cheap. It costs approximately $500 for materials and two workers. You’ll need two people to do the job, and you’ll spend at least a day and a half mudding and sanding. All in all, it costs around $2,400 to plaster a ceiling. That doesn’t include the cost of painting the walls. In addition to the cost of materials, you’ll also need to invest in paints that are low in VOC.
Plastering is an advanced process that requires special skills. If the walls are curved, plastering requires special techniques and materials. In addition, you won’t be able to hang anything on plastered walls. In contrast, if you have a curved wall, you can use Gyprock Flexible, which is 6.5 mm thick and easy to bend. It’s important to know that plastering a wall is more costly than installing drywall.
Easy to do
To plaster a ceiling, you’ll need to mix the proper amount of plaster. First, scoop out a small amount of compound and push it onto the ceiling. Then, spread it evenly. Repeat the process until the entire ceiling has been plastered. To make the process easier, you can use a trowel. If you’re using a hand trowel, you can tilt it slightly so that the plaster is angled away from you.
For the traditional way of plastering, fill a large bucket about a third of the way with clean, cold water. Add plaster, until a heap forms on the surface. Then, use a paddle to stir the plaster on low speed. You want the plaster to be between peanut butter and mayonnaise in consistency. Be sure to keep another bucket of water handy for cleaning your tools after each use. Or, purchase ready-mixed plaster from your local building supply center or on the Internet.
The next step is to sand any patches. You should make sure the patching material blends with the plaster. Don’t sand it too much or you’ll end up ruining the joint compound repair. Always use a protective mask and work slowly to avoid injury to yourself or others. Once you’re done, clean up the area thoroughly with a damp sponge to remove any excess plaster and then finish plastering the ceiling.
If you have a rough ceiling, you can apply plaster over the patch. While this technique isn’t necessary for all ceilings, it makes the patch more palatable and easy to hide. The only drawback to this technique is that it doesn’t match the surrounding area perfectly. For a smooth, even finish, you can apply a light coat of paint to the patch. Remember that the painting should be light and not cause any dripping. Make sure you protect your floor from any paint dripping. Once the patch is dry, inspect it to make sure it looks well.
If you are doing a DIY project, you can use Polyfilla, which is a multipurpose filler. The cellulose-based material is much stronger than spackle and can smooth uneven plaster and skim up to 3mm thick. It is a great choice if you’re unable to complete a plaster job. A few tips will help you complete the job. Just remember that you may need a professional to plaster a ceiling, but if you are confident enough, you can also do the job yourself.
Requires fewer tools
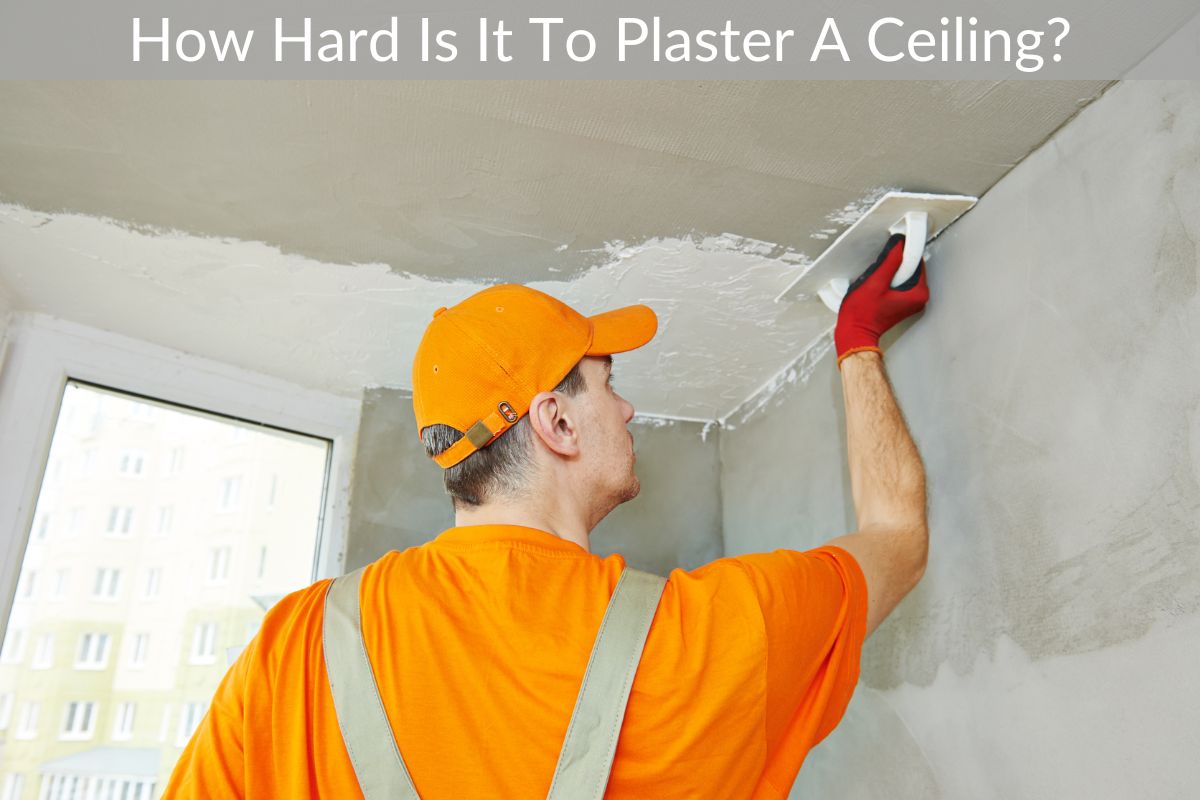
To plaster a ceiling properly, you need less tools and a few basic steps to follow. Using a multi-finish plaster is the best choice for a ceiling, as it has fewer tools and can be applied in smaller areas. The following video demonstrates how to use a trowel to smooth the plaster. You can also watch Tommy’s Yard’s video to learn how to plaster a ceiling in the same way.
First, you must prepare the surface of the wall or ceiling before you start. This is important as you don’t want to mix plaster too slowly, which can damage the lath underneath it. Another way to remove loose plaster is to use a knife to scrape it off without damaging the lath. The knife should be sharp enough to cut through a large chunk of plaster. Once you’ve scraped away loose plaster, you can apply new plaster.
High speed trowels are another option. These tools are better for plastering because they allow for precision cuts, and do not bend or flex the lath behind them. However, they can create more dust than other tools. You can minimize dust by using a HEPA vacuum and controlling surface moisture. Lead safety practices should also be followed. Wear a respirator if you’re working around any lead paint. Also, use the proper tools for plastering.
A five-gallon bucket is a must-have tool for any plastering job. You will be mixing plaster several times, and an inexpensive bucket will crack after repeated use and bumps on the job site. The bucket should also be strong, as plaster is very heavy. A good quality bucket, like a sturdy one from Encore Plastics, will last for many years and can last for a lifetime.
Fine Grain Plaster is a good choice for walls and floors. Corners are tough to trowel, and a finished corner can be the most fragile and prone to chipping. Gypsum plaster comes in powder form and is applied in 35-40 minutes. Gypsum plaster is less expensive than lime plaster and requires fewer coats. It can be tinted and is less expensive than lime plaster.
Takes less time than drywall
If you want to install a ceiling, you might be wondering whether it will take less time than drywall. If you’re working on a new construction project, you can easily complete the project on your own in a shorter amount of time. One of the biggest benefits of plastering your ceiling is that it is easier to install than drywall. It is a great choice for small rooms and can be finished in just a day.
Plaster walls can be tricky to install because they are held together with suction, mechanical bonds, and a chemical bonding agent. It is difficult to install plaster on curved walls and can bounce nails out. Plaster walls also often have holes bigger than the nail itself, making it difficult to nail properly. Hence, loose nails often come out. So, you have to take care of the holes before you can proceed with the plastering process.
In addition to being more affordable, drywall is also easier to install. It doesn’t require as much time as plastering. It can provide better insulation and has more options for energy-saving. You can also hang things more easily. However, plastering your ceiling may take longer. This is why it is recommended to start plastering heavy traffic areas early. If you’re unsure about which material to choose, you can always consult a professional.
When choosing between drywall and plaster, there are many advantages and disadvantages to both. While the former is cheaper, plastering your ceiling can cost as much as $390. As with drywall, plastering your ceiling may cost between $2 and $10 per square foot. However, you can save money by hiring a professional to do the job for you. While plastering a ceiling may not be cheaper, it can last a lot longer than drywall. The installation process is more complicated and requires more skill.
Plastering a ceiling is not a difficult project if you know how to work efficiently. In fact, it’s easy to do if you’re a professional. You’ll need some help, but you should be able to finish a 12-by-16-foot room in a day or two with the help of a professional. You’ll need to allow time for drying between each coat.
How to Plaster a Ceiling
Before you start learning how to plaster a ceiling, you should know what the process entails. There are many steps that you must take, including choosing the right plasterer, safety precautions, and jointing and finishing plasterboard. Read on for a detailed guide to the process. This article is written for amateur plasterers, but can be useful for professionals as well. It also covers the cost of plastering a ceiling.
Cost of plastering a ceiling
The cost of plastering a ceiling can vary greatly depending on the area you need done. The size of the room will have a major impact on the total cost as well. Small rooms may need less plaster but a large room may require more intricate work. Small rooms require a plasterer to be careful, and working in tight spaces will extend the overall time and cost of the project. The cost of plastering a ceiling will also depend on the type of plaster needed and the quality of the finish.
Skimming, or the application of a thin layer of plaster over existing plaster, will add to the overall cost. Skimming the ceiling is similar to skimming a wall, but it is more difficult. Skimming the ceiling requires a lot of precision and time, so it is recommended to complete a smaller area at a time. Skimming can cost anywhere from PS150 to PS200 per square foot, depending on the type of ceiling and the difficulty of the project.
Skim coating a ceiling can cause bumps. These bumps can be removed with sandpaper. Patching holes and cracks in the ceiling can also increase the cost, as you will need to remove loose plaster particles. You must also allow time for the plaster to dry after each coat. And, once the ceiling is plastered, you will have to wait another three to four days for it to set. So, if you’re wondering what the total cost of plastering a ceiling will be, you’ve come to the right place!
Plastering a ceiling can vary from $300 to PS800. How much the project will cost depends on the size of the ceiling, whether it’s flat or angled, and if it requires a special finish or texture. The price will vary greatly, so it’s important to find a company that offers a comprehensive package. The average cost for plastering a ceiling in Auckland is around $350 to $400 per square foot.
Choosing a plasterer
Choosing a plasterer for your ceiling is no small task. Choosing the right plasterer is crucial, so you should ensure that you get quality work. If you get a quote over the phone, make sure that it is written down as you will need to refer to it later. If the plasterer you choose is not registered, you will have to pay for the work twice. Getting a written quote will save you time and money.
The cost of good plastering can be prohibitively high, so choose a reputable tradesperson. While it may be tempting to hire the cheapest plasterer, good plastering requires a great deal of preparation. You could have a tradesperson plaster a bedroom one way, but get a different result that takes half the time, and will cost half as much. It can be dangerous to choose a cheap plasterer, because it could lead to cracks in the plaster.
Another important factor to consider is the type of finish you want for your ceiling. If you want a more rustic, natural-looking ceiling, go for the pebble finish. Pebble plastering involves small stones being added to the plaster before it dries. The plasterer can apply this finish with a float or by using a texturing machine. Once the plaster has dried, he will smooth out the surface by pressing down on it firmly.
Before hiring a ceiling plastering service, make sure that the area is completely empty and free from electrical wiring. If there are any lighting fixtures, remove them before plastering. A plasterer will have the materials and tools ready, including a separate water supply. You can also hire a Tasker to buy materials for your ceiling if necessary, and then turn them over when they finish. Once the plaster is dry, it is time for the second coat.
Safety precautions
There are numerous risks associated with installing a ceiling. Plasterers must take appropriate health and safety measures and undergo appropriate training. They must avoid working near electrical hazards and work at heights. However, there are also many basic safety precautions that you can take to ensure the safety of yourself and others. When you begin the job, always make sure that all power is off, and check for any tripping hazards.
You should take appropriate scaffolding for the work site. Double steel scaffolding is the best choice for exterior walls and ceilings. It should be sturdy enough to support all loads and be independent of the work itself. It should also have two sets of vertical supports. This will ensure that there is no risk of tripping over the scaffolding during the plastering process. Make sure that your plaster is properly leveled before you begin the job.
Use proper plaster materials. Check the water cement ratio. Plaster materials must meet IS regulations. Use clean equipment. It is also essential to follow a method statement. Always check your plaster mix before you begin the plastering process. This statement will ensure that all plaster materials are safe for humans and are complied with current regulations. Make sure to use protective clothing and dust masks to ensure the safety of everyone involved.
Be aware of the dust created during the plaster demo process. Plaster dust can be hazardous to your eyes, respiratory system, and other sensitive areas. You can minimize the risk of contact with dust by covering the work area with plastic sheeting and shutting down HVAC supplies completely. Use a crow bar to cut the lath, but only after you have ensured that the plaster is secure. Afterward, carefully chip away the mold and discard it.
Jointing and finishing plasterboard
There are many different ways to join and finish plasterboard on a wall or ceiling. Depending on the area, you may want to use plasterboard, joint compound, or patching plaster. Purchasing the materials from a home improvement store can help you choose which option is right for your project. After completing the task, you will have a finished ceiling or wall. Listed below are some of the basic steps for this job.
Before you start, make sure the plasterboard adhesive has completely dried out. Remove any temporary fixings from the ceiling and then measure the joint size with a piece of paper tape. Apply Total Joint Finish using a 150mm broad knife. Holding the tape diagonally across the joint, cut out any excess compound and air bubbles. If there are any areas that need further sanding, use 150-grit sandpaper to ensure a good bond.
Once the jointing compound has dried, use a jointing knife to smooth out any lumps or over spills. Apply a second coat of jointing compound in the same manner, feathering it out as much as possible and leaving 12 hours before you apply the final coat. Sand the surface using 120-grit sandpaper. After 24 hours, apply drywall primer. Once the finish has dried, it is time to paint the ceiling.
To finish the plasterboard, you need to fill in all the gaps and joints. It is possible to use paper tape to fill the gaps between the boards, but you have to be careful not to overfill the joint – it will cause the joints to crack. Fortunately, this is a very easy process to complete. You can save money on the plaster by hiring a professional to do the job.
Using a trowel
When you’re finished plastering your ceiling, you should apply a fine coat. This should be a thin layer about one eighth to one quarter of an inch thick. You can use it to fill holes, indentations, or other imperfections. Then, you can add another coat of plaster, making sure to smooth it out before applying the finish coat. This step is especially important if you don’t have a lot of experience plastering ceilings.
The first step in applying plaster is to hold the trowel at a low angle to the ceiling, so the long side is flush with the wall. When applying plaster, make sure to push it lightly along the surface, and then apply more pressure where necessary. When applying the plaster, make sure to apply in perpendicular strokes, and use more pressure where necessary. A third pass is sometimes necessary to get a smooth surface.
The blade of a trowel is attached to the shank by rivets. These rivets can protrude partially or all the way through the shank. Many leading manufacturers use different rivet sizes, and some even place the larger headed rivet on the toe end. You can also use a heel end rivet. Using the right size and type of trowel will ensure that you get a smooth finish.
There are two types of trowels available for plastering. Basic plastering jobs call for a rectangular float plasterer’s trowel. For edging, use a drywall trowel with a narrow v-shaped tip. The edging trowel is an excellent tool for finishing your work. If you’re a beginner, a basic joint compound corner trowel will do just fine.